DEADROP Creator Modes Documentation
Use the API link above to browse the documentation.
Computer Setup
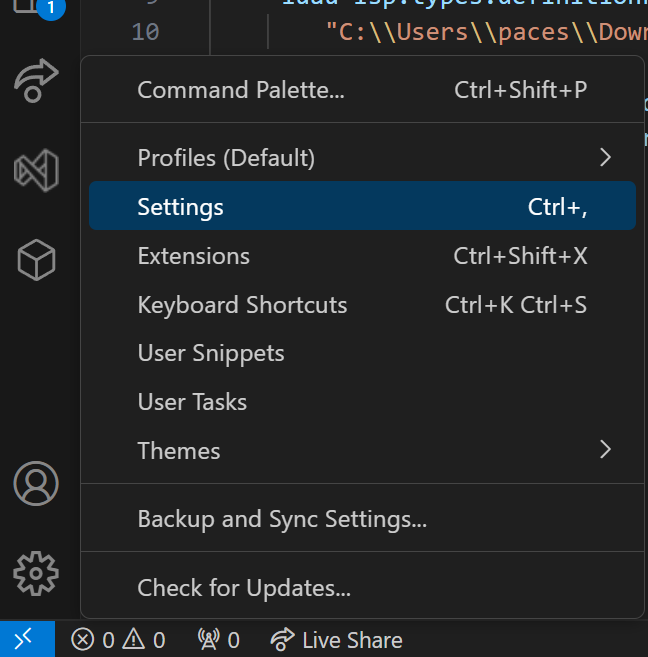
- Install Visual Studio Code
- https://code.visualstudio.com/docs/setup/windows
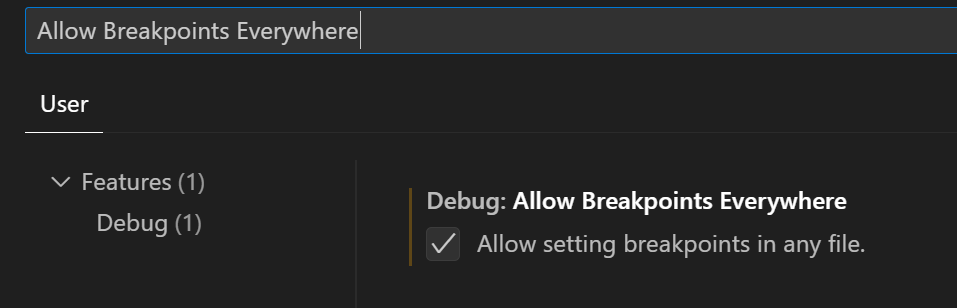
- Enable “Allow Breakpoints everywhere”
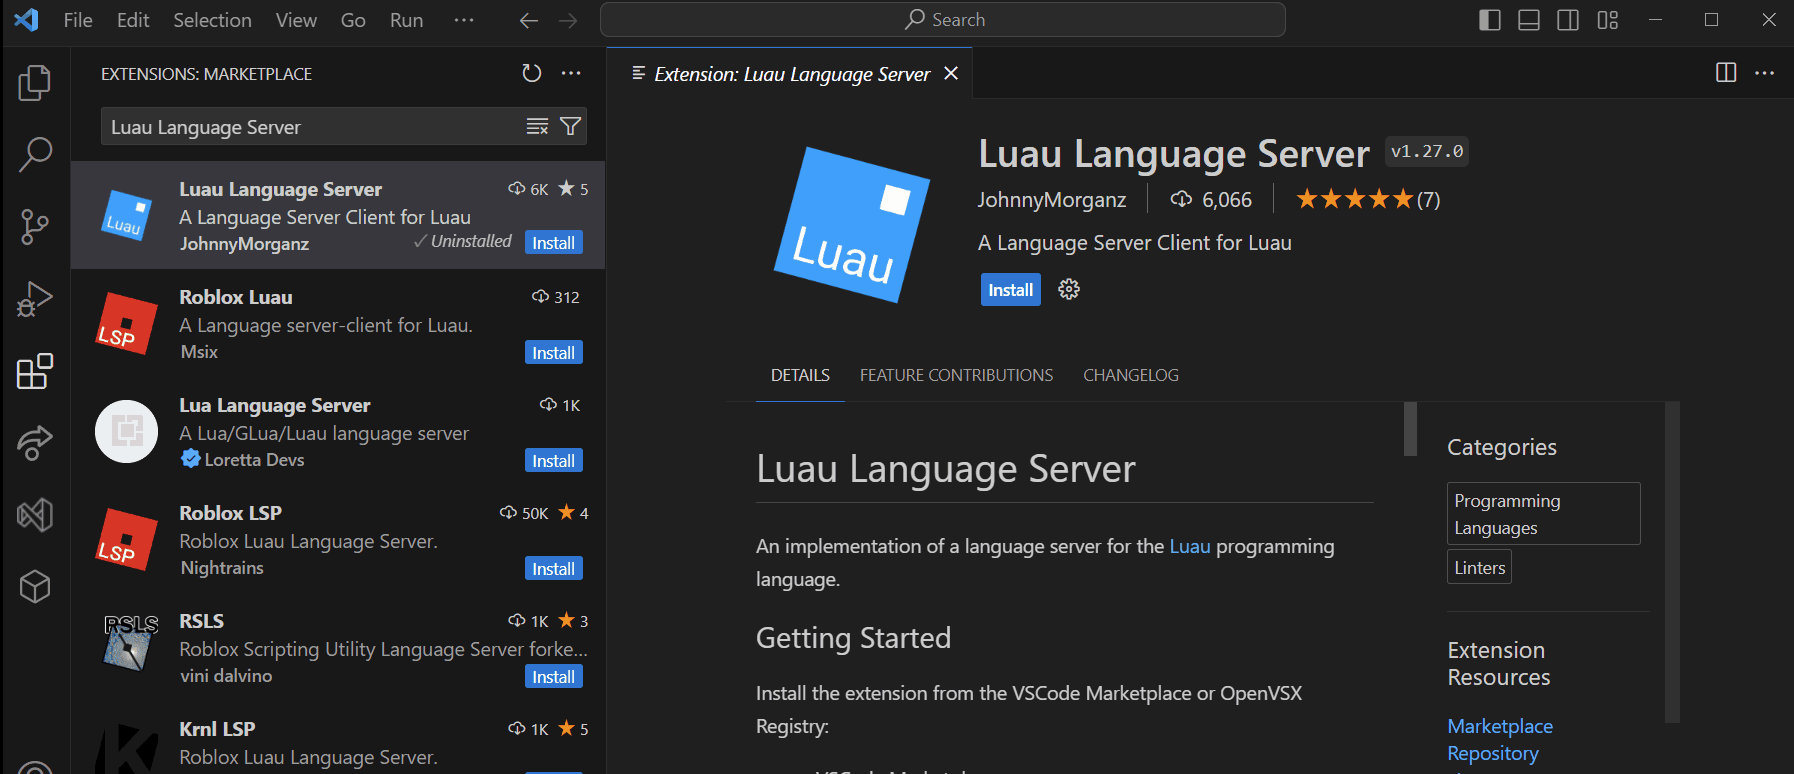
- Install the Luau Language Server Extension
- https://marketplace.visualstudio.com/items?itemName=JohnnyMorganz.luau-lsp
- Configure Lua Language Server
- Disable Roblox Type Definitions
- Disable Fflags syncing
- Disable Rojo Sourcemap
- Download the type definition file and configure the extension: deadrop.d.luau
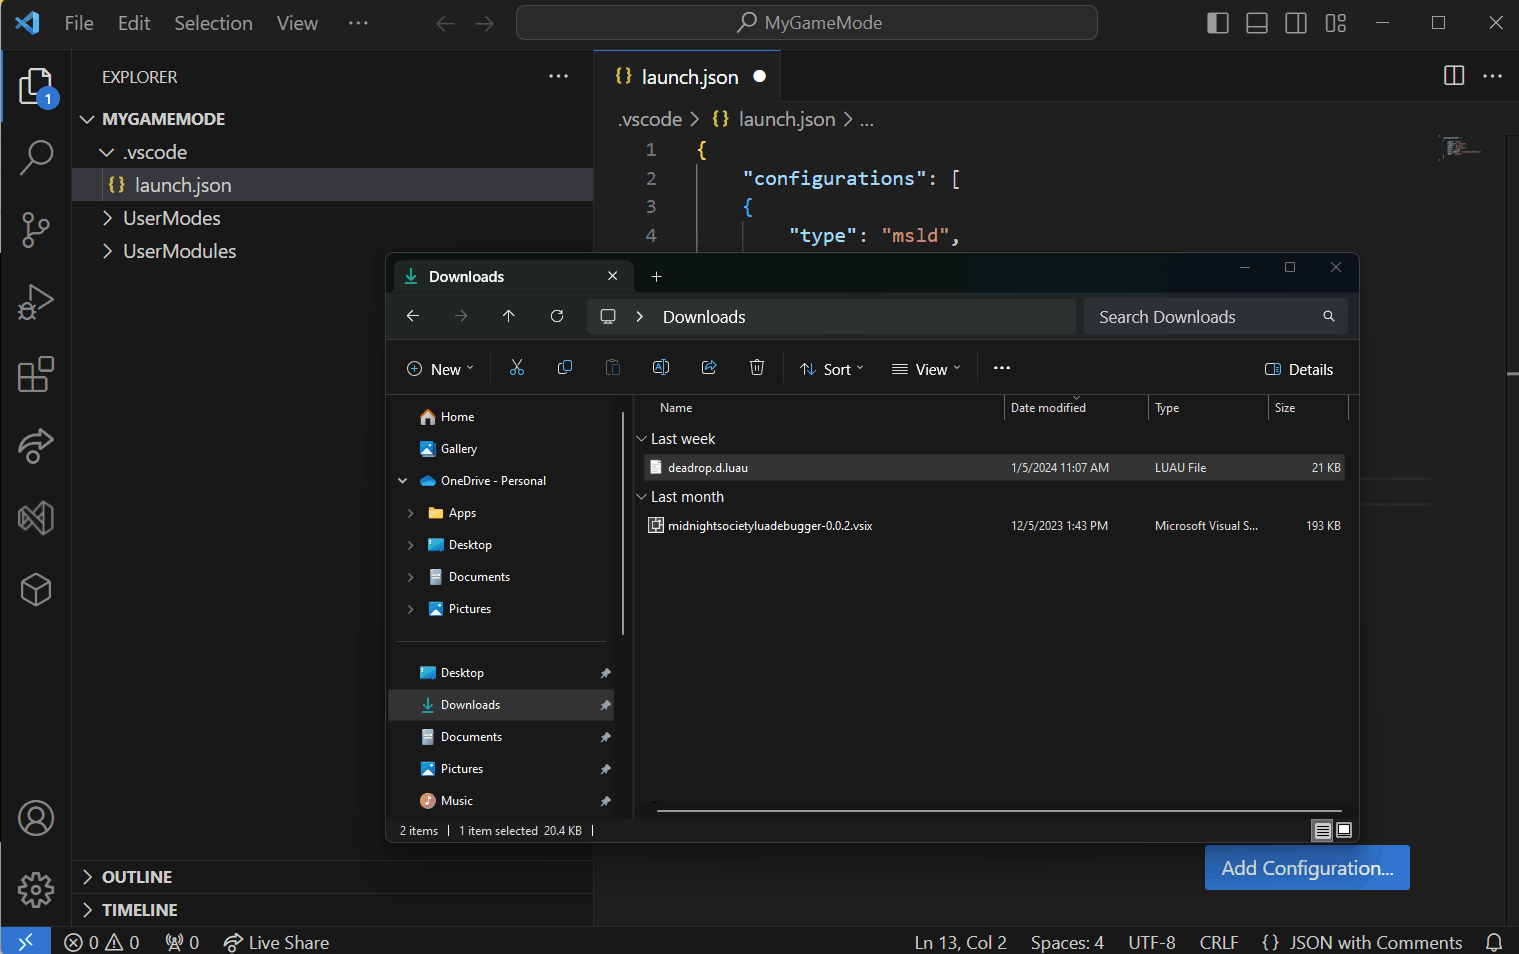
- Download and install the Midnight Luau Debugger Extension
- The download can be found here: msld.vsix
- Install the msld.vsix file
Setup Blank Project Directory
Create an empty folder on your computer (in this example we’ll make it on the desktop)
Open this folder
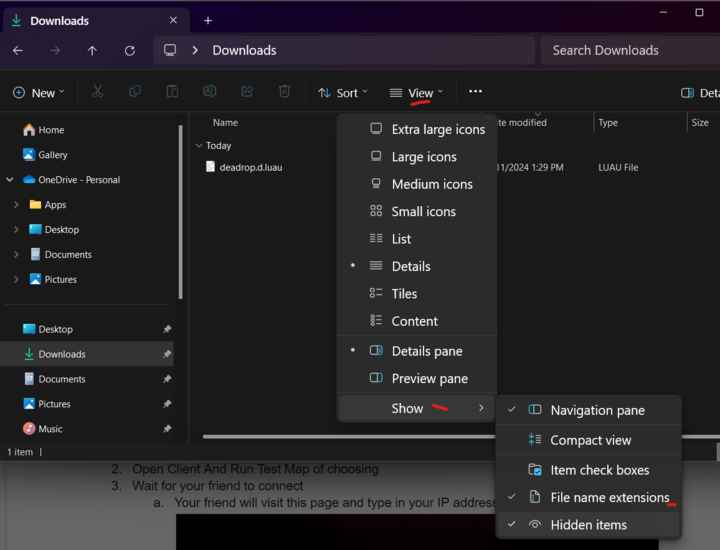
- Make a “.vscode” folder
- Inside this folder create a “launch.json” file (leave empty for now)
- If you are following the video and cannot change the file extension you may need this option:
- If you are following the video and cannot change the file extension you may need this option:
- Inside this folder create a “launch.json” file (leave empty for now)
- Make a
UserModesfolder - Make a
UserModulesfolder
- Make a “.vscode” folder
Open the project folder in VS Code.

Open The launch.json and add the msld default config.
{
    "configurations": [
    {
        "type": "msld",
        "request": "attach",
        "name": "Midnight Debug",
        "host": "127.0.0.1",
        "port": 21110,
        "sourceRoot": "${workspaceFolder}",
        "map": "Canyon"
    }
    ]
}
Change the map name to “Canyon”.
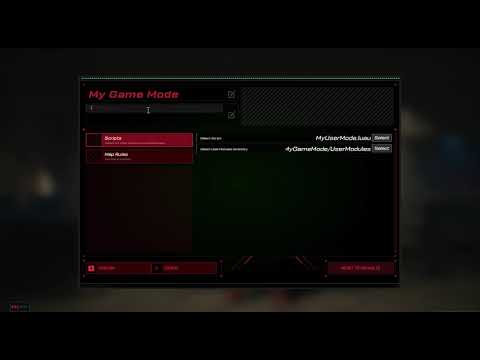
Make a Mode
- In the “UserModes” folder create a “MyUserMode.luau” file
- Make a really simple mode.
local GameMode = Moon.GameMode.First()
GameMode.AutomaticRespawn = true

local Players = {}

GameMode.OnLogin:Connect(function(Player)
    print("Someone joined!")
    table.insert(Players, Player)
end)

MS.Utility.SetTimer(function()
    print("Ending the match after 20 seconds, everyone's a winner!")
    GameMode:EndMatch(Players)
end, 20)

print("Our mode ran!")
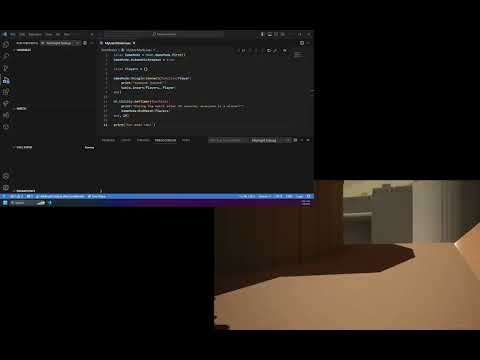
Single Player Testing
- Open Client And Run Test Map of choosing
- Connect debugger
- Select script for restart
- Identify and fix issues
- Edit/Restart Script
- See that the script is now working
Publishing
- Publish the script
- Share the Refiner Code
Testing with Multiple Players
Sometimes a mode can be tested alone, but often it’s impractical or impossible to thoroughly test a mode with only one player. The test mode described in (document link coming soon) can also be used to allow friends to join your local mode while you are developing and debugging it. It does require some additional one-time network setup.
One-Time Setup
- Setup Port Forwarding For Local Multiplayer Testing
- If you want or need to test with more than one player who is not on your home network you will need to open port 7777 in your network and forward it to your development PC. Every router is somewhat different so it is not possible for us to give you exact directions on this step, but https://nordvpn.com/blog/open-ports-on-router/ may serve as a starting point. Future releases will resolve this issue without the need to open ports.
- Some Routers and/or internet providers require using an app to forward ports. Such as xfinity: https://www.xfinity.com/support/articles/port-forwarding-xfinity-wireless-gateway
Multiplayer Testing
- Find your public ip address to share with your friend
- Visit a site like https://www.showmyip.com/ and make note of your ipv4 address
- Open Client And Run Test Map of choosing
- Wait for your friend to connect
- Your friend will visit this screen and type in your IP address
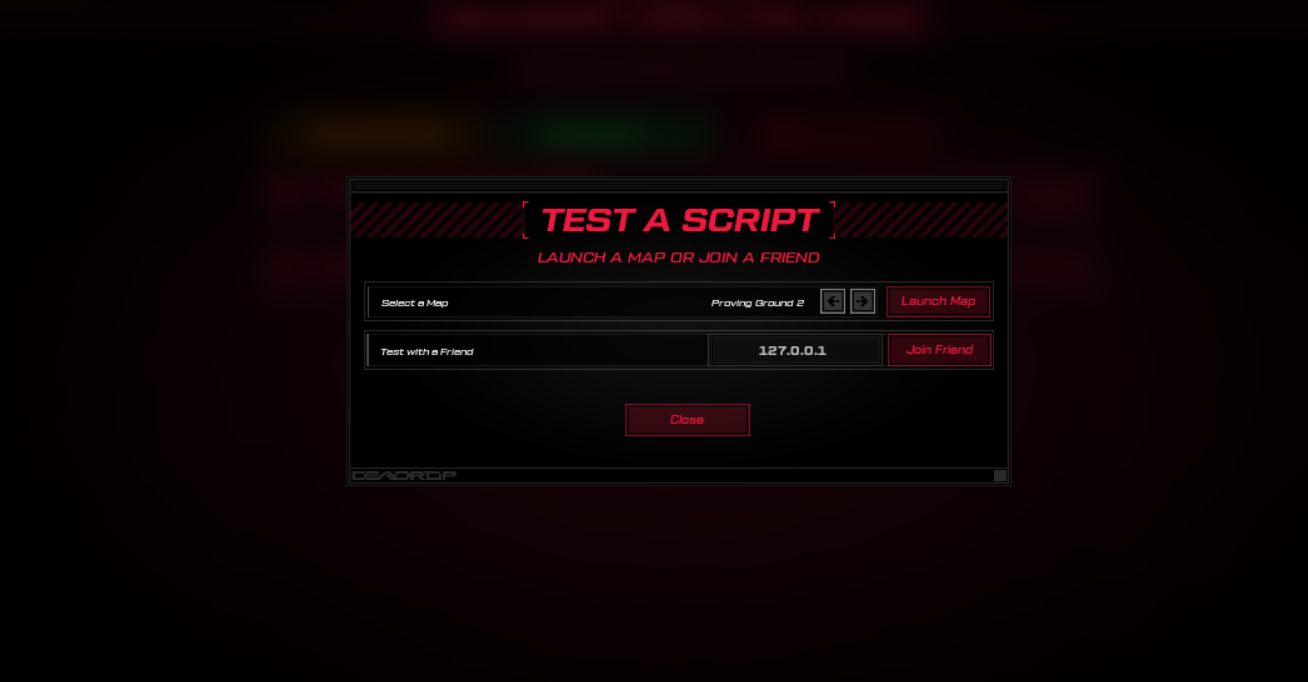 Test as normal now with your friends who have joined.
Players should stay connected to your map through restarts and new script selections. The only time they will disconnect is if they return to home either through a match ending or through their menu.
Some Extra Detail On Selected Topics
Example Modes and Modules
When you attach your debugger to the Deadrop client an “ExampleModes” and “Modules” folder are populated (or refreshed) for you. Changes you make to these modes and modules will be ignored. They are there for reference and Modules are there for your use. Some of these modes are fully working while others are work in progress or there for testing. You’re in our playground now!
Matchmaking with a Refiner Code
Once you have published a mode a refiner key is available. Published modes will not start until a minimum (currently 4) player count is met and are all matchmaking into the same key.
Map Names in launch.json
The map name in the json will dictate when you restart or select a new script what map loads. To change this value you must disconnect and reconnect your debugger.
In 7.5 the valid map names for the launch.json are
- Canyon
- Proving Ground 2
- Proving Ground 3